Sunday, November 06, 2016

Gift Card Cozy/Sock Swatch

I'm working on a troublesome design idea that is requiring me to make lots of small swatch experiments. The idea hit me to turn these little test pouches into gift card cozies. Here's my basic recipe:

  • Using sock yarn and 2.5mm sock needles,Turkish cast-on 22 loops.
    I originally wrote "24 loops," but that's a bit loose. YMMV.
  • Knit across 22 stitches; turn.
    I loop the working yarn around the cable on the opposite side. This makes a wrap that I can use to close the short-row gap by working k2tog-tbl at the end of the first round.
  • Knit a few rounds plain.
This creates a little pouch, 22 stitches on each side. I test two variations of my idea, one on each side.


When finished testing, knit a few plain rounds, then bind off.

---

Why do I knit 22 stitches then turn? Because I like a nice, purled turning edge at the bottom of the pouch, but I hate purling the first stitches. Knitting, then turning around to knit the other way makes that nice, sharp bottom. It's extra fussy of me to do the little short-row wrap, because I could easily sew closed any holes with the tail that's hanging there. But are you surprised that I'm extra fussy?

Monday, August 22, 2016

Olympics Day 16

The start was promising, but like many a good athlete, I didn't have the talent, drive, or luck to make it to the medal stand. I finished one sleeve in a good, competitive pace, but by Day 3 my energy was pulled elsewhere, and I began to fall short of Olympic performance.

I began the body using TECHknitter's method with a long tail cast-on rather than provisional. That proved to be a mistake. As TECHknitter warns, a hem that is knitted shut, rather than sewn, tends to flip up. Blocking probably would have corrected it, but I knew it would be a perpetual source of irritation with the finished sweater, and since it was clear by Day 11 that I wouldn't cross the finish line in time, I started over.

I'll keep at it, because I'm excited by my vision of the completed sweater, but I fear without the Olympic focus this may end up like so many of my sweaters -- unfinished at the last stage because I just don't like them well enough to follow through.


Saturday, August 06, 2016

Olympics Day 1

...and we're off!

The torch is lit in Rio, and this morning I cast on for my sweater. My goal is to make a seamless, saddle shoulder henley out of Wensleydale wool from Triskelion Yarn and Fiber.

A half-assed gauge swatch shows me at 5.5 stitches per inch, which makes my key number 235. I cast on 20% -- 47 stitches -- while waiting for my oil change and tire rotation this morning. I didn't have a second needle with me to pick up the provisional stitches to close the hem, but discovered it's not too difficult to grab those stitches from the back of the crochet chain.

I've never worked a sweater starting with the sleeves, but it seems like a better plan than starting with the body.

More about this "Rio Sweater" project as the Olympics unfold.

Saturday, April 16, 2016

Limoncello Batch #1

So the batch of limoncello I started on New Year's Day is out in the wild.

Alcohol: Everclear 190 (1 1.75l bottle)
Lemons: 20 organic from Fresh Market
Simple Syrup: 10 cups water, 7 cups sugar

The simple syrup was the problematic step. Because the Everclear was 190, instead of 151 from the recipe, I would need much more simple syrup to get the alcohol content down to something drinkable. Ben at limoncelloquest.com recommends going down to 25% alcohol if you're giving it away as a gift, but I was worried that a gallon of simple syrup would make the whole thing much too sweet.

My friend A--- wisely pointed out that you can always put more simple syrup in, but you can't take it out. So I decided to double the "standard" recipe, putting in about 13.5 cups of simple syrup.

I couldn't wait for it to mellow, and tried a shot that night (February 13). The flavor was generally good, but there was a harshness underneath. The harshness did soften a bit over time, but in the end, the alcohol content of this is really too high -- the calculator puts it at about 33%. When you hold a swallow in your mouth, it burns slightly, like Listerine.

I've bottled it up, and am selectively handing out to friends to try, encouraging them to experiment with ways to offset the alcohol. A--- thinks she wants to try mixing in some whipping cream. My best success so far was with a very good Ginger Limoncello Fizz cocktail: a shot of limoncello, a shot of ginger ale, and a couple shots of seltzer.

Sunday, January 17, 2016

Prayer Shawl

Mummy dust, to make me old. To shroud my clothes, the black of night. To age my voice, an old hag's cackle. To whiten my hair, a scream of fright. A blast of wind to fan my hate. A thunderbolt to mix it well. Now, begin thy magic spell.
--Queen, "Snow White and the Seven Dwarfs"
As a kid who was fascinated with magic and spells, I loved this section of the movie and the idea of sounds and other intangibles made into ingredients. To create a magic potion, you literally mix metaphors.

The knitting project I'm working on brought this scene to mind. My library knitting group wanted to explore shawls for our February meeting, and I decided I was going to sign up for Josh Ryks' latest mystery knit-along. It was a fun evening, and Josh was great. But instead of getting into the new shawl design, my heart was captured by an old one, Urban Survival, which Josh admits is one of his favorites.

So what ingredients are going into my Urban Survival spell? The yarn base is called Fortitude, which seems like a good foundation for survival. The set I bought includes the colors "Slush" (something to be warded against), "Earl Grey" (for comfort), and "Gun Powder." While I personally don't believe that gun powder is necessary or helpful for urban survival, the friend who is the likely recipient of this shawl certainly does. I'm adding from my stash a bit of "Midnight Blue," symbolizing...what? Late night melancholy? Quiet romance?  There's something peaceful and calm--stable, solid, and subtle--about the dark blue worked into the dark gray. And playful too, like the blue in Superman's hair.

I don't believe in magic, and I don't believe my knitting is imbued with the energies of my intentions, but I find I'm enjoying the idea of casting a spell with my yarn.

Saturday, January 02, 2016

Prepping for Christmas 2016

I hate shopping, and that makes Christmas an ordeal. I love my friends and family, and I love the feeling of having a gift for someone which is perfect for them. But I hate finding those gifts, and frankly, I'm not really thoughtful enough to come up with a different, perfect gift for every individual.

Arts fairs are cool, and I love supporting the independents who sell there, but it's too easy to find too many options for some people and nothing for others. When we went to Winterfair, I decided to just enjoy it rather than take on the shopping pressure: if I saw something cool, I would buy it, regardless if I had an intended recipient in mind. That's a strategy I may repeat. Perhaps not all the gifts I gave were home-runs, but none of them completely struck out.

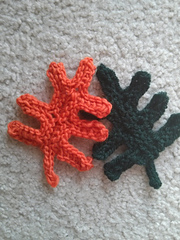
You'd think a knitter would be at an advantage here, but I hate the pressure of required knitting almost as much as I hate shopping. (Every year, Yarn Harlot chronicles the escalating stress of her Christmas knitting. I've stopped bothering to read those posts -- she brings it on herself.) Still, knitting is impressive, and at the beginning of 2015, I resolved to knit a Christmas ornament every week, so I'd have a stockpile of little, handmade gifts. I think that resolution held up for 3 weeks, producing only a couple oak leaves.

I also had this idea that my sister and I should make limoncello and give it away in little gift bottles. My plan was to start in August. But when August finally came, I was in an emotionally wretched state from the twin blows of being offered a job I didn't want and then
not being offered the job I did want.

But it's a new year, and I've got 11½ months to prepare. Friends had scored 1.75l of 190 proof Everclear for me in the fall, and my family bought me the Microplane Zester from my Amazon wishlist. I spent the first morning of 2016 zesting 20 organic lemons while running the Everclear through a filter as LimoncelloQuest.com recommends.

As for the knitting, I could take another stab at the "On Sunday We Make Ornaments" resolution, but I know it's doomed to failure. Maybe I could convince myself to do one knitted give-away per month?

IDEAS:

Saturday, November 21, 2015

Things I Wish I Had More Time to Do

I need a staycation. The list of things I wish I had more time to do is getting out of hand.


Read the 4 books I have by the bed:

Crank out the designs in progress:
  • That cuff-down thing I blogged about previously
  • Instructions for the heel of that sock
  • The amazing glove pattern
  • The glove class based on that pattern

Make things
  • Finish the top-down henley (and while I'm at it, maybe the vest that's been inches from completion for 3 years)
  • Knit the gloves I started for Andrea and the fingerless gloves Robin wants
  • Make limoncello. My plan was to have this ready for Giftmas; not going to happen.
  • Knit this toy rabbit and these slippers.
  • The felted mistletoe slippers that Mike fell in love with

Clean stuff
  • The bathroom needs rigorous cleaning of all surfaces
  • The basement is a disaster

Miscellaneous
  • Catch up on the DVR, Hulu, Netflix, and Amazon Prime queues
  • Take care of Giftmas in general (decorating, shopping)
  • Get some one-on-one social time with my sister 

Sunday, October 25, 2015

Cuff Down Detours

I've been struggling off and on all year with a new sock design. The idea first came to me on Christmas: I noticed a picture frame that had a common decorative element I've always liked, and it occurred to me that if I cocked it slightly on the diagonal, I could easily render it in the traveling slipped stitch pattern that I favor in sock designs.

For months I charted and swatched, trying different variations of the idea. All of them were slightly "off," and for a while I thought the design wouldn't work on a sock. It was too big, traveled too quickly in its diagonal spiral to fit around a foot--I was dismayed to realize that it would probably work better on a hat.

Sneak peak
I persevered, and in late June, I saw a way forward, and pretty quickly knit up a really attractive sock, one of the best I've designed. My process is to knit one sock, making notes as I go, then start writing the pattern, making the second sock from these newly drafted instructions. This prototype pair often doesn't completely match, because I make design adjustments and improvements which make the second sock slightly "better."

And it was working. As much as I liked the first sock, the second was fantastic--until I got near the ankle. The changes I'd made to improve the design on the foot caused a problem when it got to the ankle. I couldn't solve it, and in frustration, I set the sock aside.

This morning the answer came to me: it's not a toe-up design. This sock will be so much easier to knit if constructed cuff-down.

I should have realized this earlier. In fact, I kind of did, but I was disappointed, and wanted to push through. It's possible to make this design toe up, and I can pretty easily do it myself, adjusting on the fly to make the design work on any sized foot. But that kind of improvisation doesn't fit in a written pattern. So cuff-down it is.

Back to the drawing board, which has accumulated quite a layer of dust while this design was in time out.

Tuesday, September 29, 2015

A New Start with Gloves

Two years ago, the father of this gorgeous yarn (go buy some!) declared that he dislikes making socks and prefers gloves. I've made gloves before, but never felt the joy. Still, Caerthan is cool, and my dork reflexes advise me to like the things the cool kids do, so I threw myself into it.

The result was the Evil Genius Glove Recipe, a fingers-down method of making gloves. It served me for awhile, and I enjoyed the process of learning about gloves--different gussets, thoughts about fit and negative ease, ways to manage the fourchettes and inevitable holes--but my joy faded pretty quickly.

What I really wanted was a game-changing trick for gloves, something that took away the annoyance and made it fun. (I once mused on Facebook about how cool it would be if a brilliant innovator like Cat Bordhi would turn her attention to gloves.)

I think I've finally found that trick. It seems to originate with Cathy Scott, who figured out that the "peasant thumb" technique of using waste yarn to create a thumb opening could be used with a gusseted thumb and even with finger connections: no casting off and casting back on. She explained the thumb technique on her blog, but it was her IPOD Gloves pattern that blew my mind. In the past month, I've made 4 pairs of gloves, and each finger teaches me something new about how this trick works.

I hope to put out my own glove pattern--a new recipe--using this technique next year. Before then, I have a lot of testing to do to perfect the fit and instructions. I'm not making any promises, but it's possible that this journey might give me something to write about on this long-dormant blog.

Friday, February 15, 2013

Don't check bags

As I've said before, what good is a blog if you can't bitch impotently about minor inconveniences?

A few weeks ago, Mike and I were flying home from a conference, and to expedite processing at the airport, I checked both of our bags together.  Later, at the gate, they repeatedly announced that they would like to check passenger's bags for free because the flight was full and space in the overhead compartment was limited.  So that was annoying:  I paid for a service they were later offering for free.

Back at work, while I was sorting through my receipts to prepare my reimbursement request, I discovered that when I checked the bags together, I was charged extra for the second bag.  I paid them $60 unnecessarily.

So I submitted a refund request, which they have just denied.

MORAL:  Don't pay to check your bags on United.  They'll probably beg you to let them check them for you for free at the gate.

Saturday, February 02, 2013

Thumb Attempt #2

I'm still stewing in disappointment that the Cat Bordhi-inspired afterthought thumb won't work. It was just so clean! The thing I really hate about mittens and gloves is darning all the holes at the base of fingers and thumbs.

Since I need to increase the mitten circumference around the base of the thumb, there are two obvious paths. After knitting the finger portion:
  1. Knit a separate, tip-down thumb and join it at that point, then complete the mitten by decreasing down through the palm to the wrist.
  2. Cast on extra stitches, and continue working down the palm to the wrist. Work the thumb last by picking up held stitches and knitting to the tip.
For the first option, I like the I-cord technique from Handknitting with Meg Swanson. (nonaKnits also has instructions if you can't get your hands on Swanson's book).
  • The thumb circumference is about 33% of the hand circumference. Cast on half the stitches on a DPN.(Example: my mitten is 42 stitches around the hand, so the thumb will be 1/3 of that, or 14 sts; I cast on 7).
  • Work 1 row of I-cord.
  • In the second row of I-cord, K1, then repeat [M1, K1].
  • Work I-cord until thumb is desired length.
  • With a crochet hook, find the first horizontal bar at the tip, twist it into a loop, then chain up the ladders to close the gap in your tube.
At this point, you can pop the finger and thumb pieces on your hand to see where the thumb should join and how many stitches meet up. Put the stitches to be joined on holders; you can graft them closed at the end.

Work a decreasing gusset at the base of the thumb stitches as you work down the palm toward the wrist.

-----
Aside from the I-cord thumb, there's not much I like about this. The grafting is a pain, and there are messy holes to sew up at the end. I think working the thumb last is a better plan.

Sunday, January 20, 2013

Mittens Miss the Mark

My friends Jeremy and Joshua have identified a significant flaw in my new mitten recipe. I mistook the decreases that I do below the thumb for a thumb gusset. In fact, my mittens are no wider around the base of the thumb than they are around the fingers. Therefore, they do not represent a perfect fit.

A mitten's success or failure depends almost entirely on the thumb. And while this recipe produces a serviceable mitten, it in no way qualifies me for the title of Evil Mitten Genius.

Back into the lab, then. Wish me luck.

Saturday, January 19, 2013

Evil Mitten Genius

This blog has been silent for 666 days. Let us not speak of it again.

Every time I knit a sock, I pop it over my fingers to check its progress, and often I think, "I should make more mittens."  Then my attention skitters away.

But now I've gone and promised a pair of mittens for a friend, and it's made me want to develop my own recipe.  I want a customized fit, but little fuss.  As with socks, I want to grab yarn and, without a lot of planning, begin knitting a simple but perfect mitten.

Here's my prototype. (It's a first past. Expect it to change).

Fingertips
(If the first steps mystify you, check out this video demonstration by Cat Bordhi.)
  1. Turkish cast-on 3 and knit 1/2 round.
  2. Knit round with yarn and tail held together.
  3. Knit round working 1 stitch in each loop. (12 sts)
  4. Repeat [M1, K2] for round. (I use KRL for these increases).
  5. Knit 1 round plain. (18sts)
  6. [M1, K3] around.
  7. Knit 2 rounds plain. (24 sts)
  8. [M1, K4].
  9. Knit 3 rounds plain. (30 sts)
Continue in this way until mitten circumference = hand circumference + 10% positive ease.  (Measure hand at the base of the fingers, not including the thumb.  Multiply that by 1.1).

Fingers
You can knit plain until you get to the crook of the thumb, but Priscilla Gibson-Roberts recommends working some short rows across the back of the hand, spacing them about 4-6 rows apart.  Last fall, I first learned about German short rows (video tutorials here and here), and they're perfect for this purpose.
  • Knit half a round (the half for the back of your hand, if you're keeping track already).
  • Turn, doing the German short row maneuver, and purl back across these stitches.
  • Turn, doing the German short row maneuver again, and knit across the back of the hand, working the crazy turning stitch at the end.
  • Knit across the palm stitches.
  • Work the crazy turning stitch at the start of the back hand stitches.
  • Knit 4-6 rounds.
Repeat until hand is desired length.

Mark for Thumb
I tried a number of top down thumbs, but the joins were messy. Then I decided to borrow a technique from Cat Bordhi's Personal Footprints for Insouciant Sock Knitters and create an "afterthought thumb."

Divide the number of stitches in your mitten circumference by 6.  Those are the number of stitches to mark for your thumb.
  • On the palm side, decide where you're going to want to place the thumb opening.  Priscilla Gibson-Roberts recommends setting it off from the edge 5%, but you're probably safe just making that 1-3 stitches from the side. 
  • Run a short strand of thin, smooth marker yarn through the thumb stitches.
  • Knit 2 rounds.
  • Run a second strand of marker yarn through the stitches at the same place (just 2 rounds further along).
Palm
You may find it helpful to place markers one stitch outside marked thumb stitches (so if you marked 7 thumb stitches, place markers 9 stitches apart).
  • Knit to marker (or 1 st before thumb stitches). SYTK (or SSK if you prefer).  Knit up to but not including last thumb sts (or 2 sts before marker). K2TOG.
  • Knit 2-3 plain rounds.
Repeat until your SYTK and K2TOG lines meet (or are 1 st apart).

Wrist
Work in preferred ribbing to desired length.  Bind off loosely.

Thumb
Watch Cat Bordhi's video demonstration of this technique.  We're working on fewer stitches, but the method is the same.
  • Slip your needle through the stitches that you marked marked for the thumb.
  • Find the stitch in the middle of the row between your marked rows. Lift it and cut it.
  • Carefully unravel the snipped row, leaving at 1-2 stitches intact on each side.  (Cat Bordhi leaves it in 2 stitches for the sock, but we don't have as many stitches to play with).
  • Join yarn, and knit thumb in the round to desired length.
Close the thumb by working K2TOG around.  Break yarn, thread it through your stitches, then cinch the opening closed.  Work in your ends, and you're finished.

Saturday, March 26, 2011

Mastermind Resized

If you or your loved ones are not fortunate enough to have medium-sized men's feet, you can now rejoice, because Mastermind Sizing Variations are now available.

Please let me know if you discover errors in the expanded pattern.

Saturday, March 12, 2011

Presenting "Mastermind"

All of these changes in the way I make toes, gussets, and heels add up to a new basic sock pattern. I call it Mastermind.

Mastermind walks you through making a medium-sized men's sock. I'm working on padding out the pattern so that you can make larger and smaller socks, but I'm struggling to make those instructions clear and uncluttered. (It's the heel turn; doing that is complicated enough without having to make it work for 5 different sizes).

Anyway, thanks for reading along. I hope you give "Mastermind" a try. Let me know if you run into problems.

Sunday, March 06, 2011

Evil Genius Evolves: The Heel

What makes the Evil Genius pattern "mine?"

The general plan came from Widdershins, the toe from Queen Kahuna, the gussets from New Pathways, and the overall fit from Stitch Stud. I just put it all together and stirred in a bit of personality. But I also added stitch markers in the middle of the heel, marking the place in your short rows where you stop, make one, knit one, then wrap and turn. That's it. That's my only real claim to "genius."

And I'm about to throw it away for something better. And easier.

It's the wraps. Everyone hates them, but they seem to be a necessary evil: something needs to be done to close the holes left by the short rows. And then it hit me: what if I used the make one to close the gap?

It's so simple! Instead of adding stitches near the end of each short row, just work short rows and skip the wrapping. In your transition round, where you normally work the wraps together with the wrapped stitch, just pick up a new stitch in the gap.

Before and after shots:

Short rows, no wraps Gaps closed after transition round

The first time I tried it, I couldn't believe it. It was beautiful, smooth, easy, and nearly flawless. I say "nearly" because, as you can see in the picture above right (embiggen), a little hole tends to form at the right-side edge of the heel. It's not unexpected -- a similar hole is a hazard in every sock pattern I've ever encountered -- but I've yet to find an elegant, non-fussy method for avoiding or eliminating it. Any suggestions?


Shoulders of Giants
In my previous post on gussets, I mentioned the role Ted Myatt played in getting me to think about gusset placement and fit. I have to credit Stephen Houghton for pointing me in that direction (as well as so many other fruitful directions). This latest epiphany about the heel was inspired by Tallguy. He patiently explained his ideas to me in email, but it took me nearly 4 years to really get it. Thanks, guys, you are the real geniuses; I'm just an appreciative fan.

Thursday, March 03, 2011

Evil Genius Evolves: Gussets

The challenge to toe-up socks is figuring out where to start expanding for the gussets. I used to think the answer was to count rows, and I remain a die-hard row counter -- it's how you make one sock the same size as the other. Still, I get how lots of math turns people off. And that's how I came up with my new lab assistant, Gus.

Gus first made his appearance in the Evil Genius lab during the Arch-Villain project. Rather than issuing complicated instructions to calculate how many rounds long your sock should be and then subtract the gusset and heel rounds, I said:
When your sock is about 4 inches long, measure the distance of 26 rows (or rounds). It's probably between 2 - 2.5 inches. This is your gusset length -- let's call it "Gus." Continue working until your sock is "Gus" inches shorter than the total length of the foot.
Simple. Direct. Effective. And whimsical enough to be non-threatening. I've thought for some time that Gus could be put to more frequent use around the lab, particularly since I can specify whatever I want for the distance. For my own socks, Gus is usually 51 rows, or around 4 inches.

Gus, it turns out, can help me solve a persistent problem: frequently, my socks are a wee bit too long. So if I give Gus some elbow room, round him up by ¼-½ inch, that removes the extra length.

The great Cat Bordhi discovered that gusset increases, when worked 2 increases per 3 rows, could be placed anywhere around the sock. The standard Evil Genius pattern puts them in a fairly conventional line up along the instep, but Ted Myatt argues convincingly that they should be moved away from there. I've grown fond of placing them along the sole, at the width of the heel base, because that provides a nice set up when it comes time to turn the heel.

Tuesday, March 01, 2011

Evil Genius Evolves: The Toe

Changes are afoot in the lab. I've been conducting some sock-knitting experiments lately, and they're producing some very pleasing results. To begin, I've settled on a new standard pattern for my toes. It's very round at the beginning, increases rapidly but smoothly at the start, then transitions into more gradual increases for a slightly longer toe and (in my opinion) a better fit.

With desirable, fingering weight sock yarn and a 32 inch, size 1.5 (2.5mm) circular needle:
  • Cast on 14 stitches using Turkish cast-on and knit 1.5 rounds. (If you prefer Judy's Magic Cast-On, cast on 14 stitches on each needle and knit 1 round).
Begin to think of the first 14 stitches as the sole (bottom) of the foot, and the other 14 stitches as the instep (top).

I use a couple different increase methods in my toe because they produce subtly different effects. For the first increase round, I use KLL and KRL, or what Cat Bordhi calls LLinc (La-Link) and LRinc (La-Rink). This increase pulls the stitches together, reducing the tendency for increases to create corners at the tip.
  • Knit 1, KRL, knit until 1 st remains on the sole, KLL, knit 1. Repeat for instep.
Now I begin using my preferred increases -- yarnovers, which I twist in the next round so they don't leave a hole. For a left-leaning increase, I knit the yarnover stitch through the back loop. For right-leaning, I work what I call a k-twist.

k-twist: Slip next stitch knitwise onto the right needle, changing its mount. Slip the stitch back to the left needle purlwise; the front leg of the stitch now lies in back of the needle while the back leg of the stitch comes down the front of the needle. Knit the back leg like it's a normal stitch, which further twists it to the right.
  • Knit 2, YO, knit until 2 sts remain on the sole, YO, knit 2. Repeat for instep.
  • Knit 2, k1tbl, knit until 3 sts remain on the sole, k-twist, knit 2. Repeat for instep.
Repeat the last two rounds until there are 26 stitches per side, 52 stitches total.
  • Knit 2, YO, knit until 2 sts remain on the sole, YO, knit 2. Repeat for instep.
  • Knit round, twisting the yarnovers as established.
  • Knit round plain.
Repeat these three rounds until your sock is the desired circumference. Usually, that's 32-36 stitches per side, or 64-72 stitches total.

More notes:

My old Just Start Knitting toe never quite worked for me. It tended to twist on my toes, and sometimes I could feel a ridge created by the round of doubled stitches. Also, it just didn't look as good; I prefer stitches smoothly flowing from instep to sole over the tip of the toe. Anatomically correct toes helped with the twist, but I dislike checking whether my socks are on the right feet.

I'm most pleased with the effect of doing the first increase 1 stitch in from the edge, then moving subsequent increases another stitch in. It makes a smooth transition from the cast-edge into the increase lines.

I've been using these toes exclusively since I put all this together last summer. I hope you like it.

Saturday, February 26, 2011

Gloves

Look! A blog post. Must be a blue moon.

These are my gloves. Their purpose was to make my hands less cold when jogging, but instead I've been using them as winter wear. They are inadequate. Also, I don't jog when the temp is below 50°F.


These will be my new gloves.

The fiber is a blend of yak and alpaca. One skein was all I could afford, and I've been laboring to find a project worthy of it. The gloves aren't visually very impressive, but I love how they feel.

Ages ago, I ran across this intriguing and easy method for working fingers, and constructing gloves from the fingertip down. Predictable that Toe-Up Sock Man would be into these gloves, right? Oddly enough, I think I prefer working gloves from the cuff. I've used a pattern called "Pop Up Paws" by Mary O'Keefe-Dockman a couple times, and I love how they fit. I'd link to the pattern for you to buy, but I can't find it for sale anywhere on-line.

I wonder if gloves/mittens will become a new thing with me? I'm dying to make mittens out of silk mawata, and these gloves look like too much fun.

Saturday, October 23, 2010

Ebook Lemonade

Last week, the UK-based Publishers Association announced guidelines for ebook lending, including a requirement that libraries can only provide ebooks to patrons who are physically at a library branch. My friend Laura tweeted, "I think Overdrive can kiss more than half of its library business goodbye after this." I agree. On top of all the other crap we have to put up with to offer Overdrive-managed ebooks to library patrons, this further restriction would be too much.

But then I began to think: this idea could be workable. I could accept those terms--patrons can only download a library's ebooks if they came to the library --if some of the other requirements were lifted:
  1. No waiting. If the library owns the ebook, it is available when you come in to download it, no matter how many other people have also downloaded it.

  2. No DRM, or a loan period so long that DRM doesn't really matter. I'd say at least 6 months; a year would be better.

  3. Costs must be reasonable. Libraries should expect to pay more for ebook distribution rights than they would for a single copy of a hardback book, but costs should be in line with libraries' current expenses. (I think I'll explore what this means in a future post).
If the only barrier to the service is that you have to go to the library, I could accept that, because we could find interesting ways to make that work. Oz knows that we could be doing a better job with download customer service; face-to-face help in the library would be a fantastic improvement. We could explore partnerships in the community to provide E-branches in coffee shops, airports, or other WiFi hotspots. We could develop Ebook Kiosks for malls, community colleges, parks, etc.

We've already given up so much in our pathetic attempts to be at the ebook table. I see some potential here to win back some power.