What makes the Evil Genius pattern "mine?"
The general plan came from Widdershins, the toe from Queen Kahuna, the gussets from New Pathways, and the overall fit from Stitch Stud. I just put it all together and stirred in a bit of personality. But I also added stitch markers in the middle of the heel, marking the place in your short rows where you stop, make one, knit one, then wrap and turn. That's it. That's my only real claim to "genius."
And I'm about to throw it away for something better. And easier.
It's the wraps. Everyone hates them, but they seem to be a necessary evil: something needs to be done to close the holes left by the short rows. And then it hit me: what if I used the make one to close the gap?
It's so simple! Instead of adding stitches near the end of each short row, just work short rows and skip the wrapping. In your transition round, where you normally work the wraps together with the wrapped stitch, just pick up a new stitch in the gap.
Before and after shots:
The first time I tried it, I couldn't believe it. It was beautiful, smooth, easy, and nearly flawless. I say "nearly" because, as you can see in the picture above right (embiggen), a little hole tends to form at the right-side edge of the heel. It's not unexpected -- a similar hole is a hazard in every sock pattern I've ever encountered -- but I've yet to find an elegant, non-fussy method for avoiding or eliminating it. Any suggestions?
Shoulders of Giants
In my previous post on gussets, I mentioned the role Ted Myatt played in getting me to think about gusset placement and fit. I have to credit Stephen Houghton for pointing me in that direction (as well as so many other fruitful directions). This latest epiphany about the heel was inspired by Tallguy. He patiently explained his ideas to me in email, but it took me nearly 4 years to really get it. Thanks, guys, you are the real geniuses; I'm just an appreciative fan.
Too little insightful commentary; too many pictures of what I'm knitting.
Sunday, March 06, 2011
Thursday, March 03, 2011
Evil Genius Evolves: Gussets
The challenge to toe-up socks is figuring out where to start expanding for the gussets. I used to think the answer was to count rows, and I remain a die-hard row counter -- it's how you make one sock the same size as the other. Still, I get how lots of math turns people off. And that's how I came up with my new lab assistant, Gus.
Gus first made his appearance in the Evil Genius lab during the Arch-Villain project. Rather than issuing complicated instructions to calculate how many rounds long your sock should be and then subtract the gusset and heel rounds, I said:
Gus, it turns out, can help me solve a persistent problem: frequently, my socks are a wee bit too long. So if I give Gus some elbow room, round him up by ¼-½ inch, that removes the extra length.
The great Cat Bordhi discovered that gusset increases, when worked 2 increases per 3 rows, could be placed anywhere around the sock. The standard Evil Genius pattern puts them in a fairly conventional line up along the instep, but Ted Myatt argues convincingly that they should be moved away from there. I've grown fond of placing them along the sole, at the width of the heel base, because that provides a nice set up when it comes time to turn the heel.
Gus first made his appearance in the Evil Genius lab during the Arch-Villain project. Rather than issuing complicated instructions to calculate how many rounds long your sock should be and then subtract the gusset and heel rounds, I said:
When your sock is about 4 inches long, measure the distance of 26 rows (or rounds). It's probably between 2 - 2.5 inches. This is your gusset length -- let's call it "Gus." Continue working until your sock is "Gus" inches shorter than the total length of the foot.Simple. Direct. Effective. And whimsical enough to be non-threatening. I've thought for some time that Gus could be put to more frequent use around the lab, particularly since I can specify whatever I want for the distance. For my own socks, Gus is usually 51 rows, or around 4 inches.
Gus, it turns out, can help me solve a persistent problem: frequently, my socks are a wee bit too long. So if I give Gus some elbow room, round him up by ¼-½ inch, that removes the extra length.
The great Cat Bordhi discovered that gusset increases, when worked 2 increases per 3 rows, could be placed anywhere around the sock. The standard Evil Genius pattern puts them in a fairly conventional line up along the instep, but Ted Myatt argues convincingly that they should be moved away from there. I've grown fond of placing them along the sole, at the width of the heel base, because that provides a nice set up when it comes time to turn the heel.
Tuesday, March 01, 2011
Evil Genius Evolves: The Toe
Changes are afoot in the lab. I've been conducting some sock-knitting experiments lately, and they're producing some very pleasing results. To begin, I've settled on a new standard pattern for my toes. It's very round at the beginning, increases rapidly but smoothly at the start, then transitions into more gradual increases for a slightly longer toe and (in my opinion) a better fit.With desirable, fingering weight sock yarn and a 32 inch, size 1.5 (2.5mm) circular needle:
- Cast on 14 stitches using Turkish cast-on and knit 1.5 rounds. (If you prefer Judy's Magic Cast-On, cast on 14 stitches on each needle and knit 1 round).
I use a couple different increase methods in my toe because they produce subtly different effects. For the first increase round, I use KLL and KRL, or what Cat Bordhi calls LLinc (La-Link) and LRinc (La-Rink). This increase pulls the stitches together, reducing the tendency for increases to create corners at the tip.
- Knit 1, KRL, knit until 1 st remains on the sole, KLL, knit 1. Repeat for instep.
k-twist: Slip next stitch knitwise onto the right needle, changing its mount. Slip the stitch back to the left needle purlwise; the front leg of the stitch now lies in back of the needle while the back leg of the stitch comes down the front of the needle. Knit the back leg like it's a normal stitch, which further twists it to the right.
- Knit 2, YO, knit until 2 sts remain on the sole, YO, knit 2. Repeat for instep.
- Knit 2, k1tbl, knit until 3 sts remain on the sole, k-twist, knit 2. Repeat for instep.
- Knit 2, YO, knit until 2 sts remain on the sole, YO, knit 2. Repeat for instep.
- Knit round, twisting the yarnovers as established.
- Knit round plain.
More notes:
My old Just Start Knitting toe never quite worked for me. It tended to twist on my toes, and sometimes I could feel a ridge created by the round of doubled stitches. Also, it just didn't look as good; I prefer stitches smoothly flowing from instep to sole over the tip of the toe. Anatomically correct toes helped with the twist, but I dislike checking whether my socks are on the right feet.
I'm most pleased with the effect of doing the first increase 1 stitch in from the edge, then moving subsequent increases another stitch in. It makes a smooth transition from the cast-edge into the increase lines.
I've been using these toes exclusively since I put all this together last summer. I hope you like it.
Saturday, February 26, 2011
Gloves
Look! A blog post. Must be a blue moon.
These are my gloves. Their purpose was to make my hands less cold when jogging, but instead I've been using them as winter wear. They are inadequate. Also, I don't jog when the temp is below 50°F.
These will be my new gloves.
The fiber is a blend of yak and alpaca. One skein was all I could afford, and I've been laboring to find a project worthy of it. The gloves aren't visually very impressive, but I love how they feel.
Ages ago, I ran across this intriguing and easy method for working fingers, and constructing gloves from the fingertip down. Predictable that Toe-Up Sock Man would be into these gloves, right? Oddly enough, I think I prefer working gloves from the cuff. I've used a pattern called "Pop Up Paws" by Mary O'Keefe-Dockman a couple times, and I love how they fit. I'd link to the pattern for you to buy, but I can't find it for sale anywhere on-line.
I wonder if gloves/mittens will become a new thing with me? I'm dying to make mittens out of silk mawata, and these gloves look like too much fun.
The fiber is a blend of yak and alpaca. One skein was all I could afford, and I've been laboring to find a project worthy of it. The gloves aren't visually very impressive, but I love how they feel.Saturday, October 23, 2010
Ebook Lemonade
Last week, the UK-based Publishers Association announced guidelines for ebook lending, including a requirement that libraries can only provide ebooks to patrons who are physically at a library branch. My friend Laura tweeted, "I think Overdrive can kiss more than half of its library business goodbye after this." I agree. On top of all the other crap we have to put up with to offer Overdrive-managed ebooks to library patrons, this further restriction would be too much.
But then I began to think: this idea could be workable. I could accept those terms--patrons can only download a library's ebooks if they came to the library --if some of the other requirements were lifted:
We've already given up so much in our pathetic attempts to be at the ebook table. I see some potential here to win back some power.
But then I began to think: this idea could be workable. I could accept those terms--patrons can only download a library's ebooks if they came to the library --if some of the other requirements were lifted:
- No waiting. If the library owns the ebook, it is available when you come in to download it, no matter how many other people have also downloaded it.
- No DRM, or a loan period so long that DRM doesn't really matter. I'd say at least 6 months; a year would be better.
- Costs must be reasonable. Libraries should expect to pay more for ebook distribution rights than they would for a single copy of a hardback book, but costs should be in line with libraries' current expenses. (I think I'll explore what this means in a future post).
We've already given up so much in our pathetic attempts to be at the ebook table. I see some potential here to win back some power.
Friday, July 16, 2010
Wash's Sweater Revisited -- The Body
When I was first trying to make Wash's Sweater, I would watch the scenes where the sweater appeared over and over, freezing the picture and trying to count the stitches. I worked hard to make my pattern come as close as possible to replicating the original costume piece.
That's one of the reasons why my pattern doesn't have good sizing notes, saying only, "For alternate sizes, add or subtract stitches from the sweater's Double Moss Stitch panels. Body and sleeves can be knit longer or shorter as desired."
As I said in the last post, for my Fisherman's Wool version I need to add 46 stitches to the circumference of the sweater. I put purl stitches on either side of the cable charts, and then dumped the rest of the stitches into the double moss panels. Ultimately, to make the double moss look like I wanted, I added a couple more stitches, bringing my total up to 232.
So in the last round of ribbing, I distributed 24 increases around the sweater, then started working the body pattern like this:
And this is where I am now, 10 inches past the ribbing, working up the body. I'm not really very happy with it. The decorative cable panel is just too narrow, and too much of the sweater is now the double moss filler. I'll need more repeats of the cable in order to reach the correct length.
I'm convinced that the sweater needs to be made on a bulkier yarn than Fisherman's Wool -- maybe something like Cascade's Eco Wool, which is the second most popular choice for the sweater on Ravelry. But I started out trying to make the sweater work for people who wanted to use the thinner yarn. I think my next step is to try revising the cable.
Rather than completely frog my work, I gave it to knittingbrow, who might make it into a vest.
That's one of the reasons why my pattern doesn't have good sizing notes, saying only, "For alternate sizes, add or subtract stitches from the sweater's Double Moss Stitch panels. Body and sleeves can be knit longer or shorter as desired."
As I said in the last post, for my Fisherman's Wool version I need to add 46 stitches to the circumference of the sweater. I put purl stitches on either side of the cable charts, and then dumped the rest of the stitches into the double moss panels. Ultimately, to make the double moss look like I wanted, I added a couple more stitches, bringing my total up to 232.
So in the last round of ribbing, I distributed 24 increases around the sweater, then started working the body pattern like this:
Work Double Moss Stitch over 62 sts; p1; work Rope Cable (Chart A) over the next 10 sts; p2; work Serenity Cable (Chart B) over the next 28 sts; p2; repeat Rope Cable over the next 10 sts; p1. Repeat to complete round.
And this is where I am now, 10 inches past the ribbing, working up the body. I'm not really very happy with it. The decorative cable panel is just too narrow, and too much of the sweater is now the double moss filler. I'll need more repeats of the cable in order to reach the correct length.I'm convinced that the sweater needs to be made on a bulkier yarn than Fisherman's Wool -- maybe something like Cascade's Eco Wool, which is the second most popular choice for the sweater on Ravelry. But I started out trying to make the sweater work for people who wanted to use the thinner yarn. I think my next step is to try revising the cable.
Rather than completely frog my work, I gave it to knittingbrow, who might make it into a vest.
Saturday, July 03, 2010
Wash's Sweater Revisited -- Gauge
In 2008, I recreated a sweater worn by the character Wash in two episodes of the TV series Firefly, and then worked out patterns so that other knitters could make their own. My prototype used a bulky handspun yarn, so my patterns called for a similar heavy worsted wool. But yarn like that is not easy to find, and I noticed many knitters were using a finer yarn, like Lion Brand Fishermen's Wool, to make their sweaters.
But Fisherman's Wool doesn't make a good fabric at the gauge my pattern called for -- it's too loose and open. So when I recently decided I wanted to make another of these, I thought I'd try the popular choice, and suggest some ways to revise the pattern for thinner yarns. (Also, I want to suss out a way to work the sleeves and chest together seamlessly).
So the first step is gauge. My original pattern called for 16 stitches to 4 inches in stockinette fabric, or 15 stitches to 4 inches of double moss stitch. I swatched the Fisherman's Wool on both size 7 and size 8 needles, which gave me 20 and 19 stitches per inch respectively in stockinette. After washing the swatch, I preferred the look of the fabric from the 8's.

I wanted this sweater to be 45 inches around at the chest, and at 4.75 stitches per inch, that's 214 stitches. Back in 2008, I calculated that I need to add about 16 stitches to make up for the cables. So my "key" number for the sweater is 230. I cast on 90% (208 stitches), and began knitting the 1x1 twisted rib that makes up the bottom of this sweater.

After 3 inches of ribbing, it was time to increase up to my key number for the body of the sweater. But before doing that, I would need to figure out where I was going to put the additional 46 stitches, because my original pattern is 184 stitches around, and this sweater would need to be 230. My solution is coming up in the next post.


Saturday, June 26, 2010
Genius Footprint -- The Heel
Just as during the gusset section when we had to plan to make all the gusset increases within a certain distance, for the heel we have to bring our sock to a close in the remaining inches of the foot. This takes some creativity, and again, rounds per inch is your friend.
I've knit 7.5 inches of my 10 inch foot, so I need to finish the heel in 2.5 inches. At 13 rounds per inch, I've got a little over 32 rows to complete the foot, to reduce my 98 stitches down to about 24 (which I can graft together or join in 3 needle bind-off). I could decrease at 4 points every other round. I could consult Personal Footprints, where Bordhi devotes 7 pages to mapping out different rates of decreasing at 6 points. But I thought I'd try a reverse Hat Heel, decreasing at 8 points every 4th round 8 times until my sock is the right length, then quickly decreasing on alternate rounds to close up the hole.

Here is a pic of the bottom of my sock so far -- a closed tube that is the same length as my foot, with increases that follow the shape of my toes and an arch expansion targeted to my size. On the reverse of the tube, I've marked stitches where I will open up the sock to knit the ankle and calf.
Sunday, June 20, 2010
Genius Footprint -- Mark the Leg

Using science (that is, gauge and actual measurements of your foot), we've knit to our measurements and should be near the center of the ankle when we've completed the gusset increases. If you want, you can check this using the method Bordhi outlines in Personal Footprints: draw a line down the middle of your leg, try on your sock, and see if it reaches. You might need to add a few rows to make up for foot expansion. Now it's time to mark where your leg will be.
(You might have figured out that the point of this series was to explore whether I could successfully make socks like those in Personal Footprints for Insouciant Sock Knitters, but without everything I dislike about those socks: the round toe, the "footprint" that doesn't adapt well to different gauges, and especially the annoying trial-and-error process. But the steps that deal with opening up the leg are the parts that I really, really like about the book.)
Sock patterns are usually written with the assumption that people's ankles are about the same circumference as the ball of their foot. For most of my family, it's pretty close, but here is where you can customize. The base of my ankle is just a bit bigger around than the base of my foot, so I'm going to plan for 72 stitches in circumference rather than the 68 stitches I had at the ball.
So what I do now is run a lifeline through the stitches where I will later put the leg of the sock. If my ankle will be 72 stitches, then I need to run a lifeline through 36 stitches, centered on the top. Following Bordhi's instructions, I knit another round, marking a stitch that I will later cut and unravel for the leg opening. Then I knit the next round and run another lifeline through the 36 stitches above my first life line.

I experimented with a more familiar method -- knitting my leg stitches with a bit of waste yarn, which I later removed to knit the leg -- but the end result isn't as nice. And in this instance, I recommend following Bordhi's instructions exactly. If you can't get your hands on a copy of Personal Footprints, you can get the general idea from the Houdini Sock pattern and from Bordhi's YouTube videos.
Tuesday, June 15, 2010
Genius Footprint -- The Gusset Increases
In New Pathways for Sock Knitters, Cat Bordhi demonstrated that gusset increases can be located anywhere you want on the sock -- top, bottom, sides; neatly stacked on top of each other or randomly spaced. Where do they work best on your foot? I'm still experimenting, but I think my increases work better on the top...

...or the sides.

My theory is that if the increases follow the lines where my foot gets bigger, then the stitches won't be distorted by the changing shape of my foot -- they'll flow in more or less straight lines from the toe to the heel.
Sunday, June 13, 2010
Genius Footprint -- The Plan
The Genius Footprint is based on measurements and gauge. The toe is your gauge swatch; now you need these key measurements:
Circumference around the ball of the foot- Circumference at the widest part of the foot: around the heel and instep (see picture at right for illustration)
- Length of foot (Best way: put a ruler on the floor, extending out from a wall; stand on the ruler, back of the heel pressed against the wall)
- Length from the tip of the longest toe to the center of the ankle (see this blog post for advice).
We've already calculated how the sock will fit around the ball of the foot: gauge x circumference x 88% for negative ease. Now calculate how many stitches the sock will need to be at its widest. My foot is 9 inches at the ball, 13 at the heel/instep, or 68 stitches at the ball and 98 at the widest point. I will need to increase 30 stitches over the gusset section.
Gusset sections begin about halfway along the foot. My foot is 10 inches long, so I will start my gussets when the sock is about 5 inches. I can safely continue knitting for a few inches, give myself some more fabric so I can accurately check row gauge. My sock is 13 rows (or rounds) per inch, so I'll want to start my gussets near round 65.
The increases need to be completed before the center of the ankle. For me, that's at 7.5 inches, or round 98. Isn't that handy? I'll need to make 30 gusset increases, and I've got just over 30 rows to do it.
I can knit plain up to row 68, and ponder what I want to do with the gusset section.
Saturday, June 12, 2010
Genius Footprint -- The Toe
The Genius Footprint begins with an anatomically correct toe.
[Gauge = 8.5 stitches per inch]
Turkish Cast-On
- Hold your circular needle so that both ends are together, pointed to the right.
- Pull the bottom needle to the right, so your top needle is held together with the bottom cord.
- Start your yarn in back of the needles, leaving a 12" tail hanging.
- Wrap the yarn over toward you, down across the front and up the back of the needles.
- Wrap until you have 7 loops.
Rounded Toe
- Knit across the stitches on the "top" needle. Be sure to keep your stitches snug on the "bottom" needle.
- Hold working yarn and tail together, and work 1 round. (This doubles the number of loops on each side -- 14 per side, 28 total.)
- Drop the tail, and knit one round, working one stitch in each loop.
Begin to think of the first 14 stitches as the sole (bottom) of the foot, and the other 14 stitches as the instep (top).
Toe Increases
- Knit 2, YO, knit until 2 stitches remain of sole stitches, YO, knit 2. Repeat for the instep.
- Knit round, working the first yarnover on each side through the back loop, and the second yarnover as k-twist*.
Repeat these two rounds until you have 48 stitches, 24 stitches per side (or until your sock is about an inch long). Then continue knitting but stop increasing on one of the ends. For example:
Left Foot
- Knit until 2 stitches remain of sole stitches, YO, knit 2. On instep side, knit 2, YO, knit to end of round.
- Knit round, working the yarnover at the end of the sole stitches as k-twist, and the yarnover at the beginning of the instep stitches through the back loop.
Right Foot
- Knit 2, YO, knit to end of sole stitches. On instep, knit until 2 stitches remain, YO, knit 2.
- Knit round, working the yarnover at the beginning of the round through the back loop, and the yarnover at the end of the round as k-twist.
Repeat until your sock is desired circumference. For me, that's 68 stitches. For you, it's gauge x circumference around ball of foot x negative ease. (8.5 spi x 9 inch ball x 88% negative ease = 67.32, or 68 stitches).
* k-twist: Slip next stitch knitwise onto the right needle, changing its mount. Slip the stitch back to the left needle purlwise; the front leg of the stitch now lies in back of the needle while the back leg of the stitch comes down the front of the needle. Knit the back leg like it's a normal stitch, which further twists it to the right.
Saturday, March 13, 2010
I Used to Be a Folklorist
Progress cleaning the basement has been slow. I bought 5 cheap bookcases, and while I was setting them up, I discovered that mildew had flourished beneath a stack of board games. That took me a while to clean up, but the smell and stains are gone.
The biggest purge I've made so far is my folklore stuff. I took my books to the Friends of the Library, keeping only my heavily annotated copy of More Man Than You'll Ever Be. I looked through all of my graduate school notebooks and tossed everything except papers and journals. And then there was this box:
This box was what was left from previous grad school purges.
It contained the course packets I made my students buy for the composition and the folklore classes I taught. There were some of the articles that I'd copied for my general exams and my dissertation research, and the floppy disks with my data. It even had the tape recorder and cassettes I used for my Masters thesis and for my very first fieldwork project: an interview with my office mate Tom Burns (now director of the Perkins Observatory), who told me the story of the Denney Hall Elevator Ghost.
It wasn't as hard to toss all this as I thought it might be. For all of grad school, I was Mr. Folklore (or "Captain Folklore," I told people, "like a superhero, with a cape and tights.") It was harder getting over the lingering sense of failure after I'd abandoned my dissertation and my academic career. But I'm happy where I've ended up, and I don't feel much guilt and shame over that "road not taken." (Besides, occasionally Rose asks me a question about folklore and the Internet, and I get to feel smart, and convince myself that I could have succeeded on the tenure track, I just chose not to).
The biggest purge I've made so far is my folklore stuff. I took my books to the Friends of the Library, keeping only my heavily annotated copy of More Man Than You'll Ever Be. I looked through all of my graduate school notebooks and tossed everything except papers and journals. And then there was this box:
It contained the course packets I made my students buy for the composition and the folklore classes I taught. There were some of the articles that I'd copied for my general exams and my dissertation research, and the floppy disks with my data. It even had the tape recorder and cassettes I used for my Masters thesis and for my very first fieldwork project: an interview with my office mate Tom Burns (now director of the Perkins Observatory), who told me the story of the Denney Hall Elevator Ghost.
A professor was in his office on the 5th floor of Denney Hall one night, waiting for a student who never showed up for her appointment. He walked down to the 4th floor for a cup of coffee before going home, and just as he pushed the down button for the elevator, he heard screams from the floor above. When the elevator arrived, he pushed the button for the first floor and left the building. The next day, the body of his student was discovered in front of the professor's office. The professor was wracked with remorse, retired immediately, and died a few months later, a broken man. But ever since, when you're on the 4th floor of Denney Hall and you summon the elevator, the elevator always goes up to the 5th floor before opening on the 4th.Tom is a great story teller, and his version was much better than mine, with an actual appearance of the ghost in the elevator to tell his own story to a grad student.
It wasn't as hard to toss all this as I thought it might be. For all of grad school, I was Mr. Folklore (or "Captain Folklore," I told people, "like a superhero, with a cape and tights.") It was harder getting over the lingering sense of failure after I'd abandoned my dissertation and my academic career. But I'm happy where I've ended up, and I don't feel much guilt and shame over that "road not taken." (Besides, occasionally Rose asks me a question about folklore and the Internet, and I get to feel smart, and convince myself that I could have succeeded on the tenure track, I just chose not to).
Sunday, February 21, 2010
CleanQuest 2010: Return to the Basement
Two years ago, I took a week of vacation to do some serious cleaning in the house, a practice I mean to repeat annually as long as it doesn't do permanent damage to Mike's love for me. But this year's cleaning sabbatical was preempted by my mom's knee replacement surgery: I needed to spend that week helping to keep her spirits up and doing what I could to speed her recovery.
I thought there would be no cleaning this year, as things are too busy at work to take off much more time right now. But then Wednesday night, we heard a scary sound of electricity arcing and a loud "zap." The circuit that carries our dishwasher and refrigerator had fried. I began to realize that things were about to get very bad in our basement.
Access to the circuit box was impeded by a large shelving structure made up of long boards held up by two ladders (something like this, but less neat). I knew I needed to get it out of the way so workers could fix the circuit. With the ladders down, this is what our basement looks like.

Please don't put us on Hoarders.
I'm going to make it better, and this blog will help. I'm not a compulsive hoarder; I keep things because they mean something to me, remind me of pieces of my life and identity that I can't bear to toss away and forget. I think my best strategy for getting the basement under control is to blog about the things I find. If I take a picture and tell the story, the enchantments that tie these things to my life will be lifted. Rather than throwing away pieces of myself, I will celebrate and preserve them here...before tossing them in the dumpster.
It will be solipsistic, I'm sure, but you know, the blog is called "A Glimpse at Don." I think I'll enjoy it. Hopefully you won't find it intolerable.
I thought there would be no cleaning this year, as things are too busy at work to take off much more time right now. But then Wednesday night, we heard a scary sound of electricity arcing and a loud "zap." The circuit that carries our dishwasher and refrigerator had fried. I began to realize that things were about to get very bad in our basement.
Access to the circuit box was impeded by a large shelving structure made up of long boards held up by two ladders (something like this, but less neat). I knew I needed to get it out of the way so workers could fix the circuit. With the ladders down, this is what our basement looks like.

Please don't put us on Hoarders.
I'm going to make it better, and this blog will help. I'm not a compulsive hoarder; I keep things because they mean something to me, remind me of pieces of my life and identity that I can't bear to toss away and forget. I think my best strategy for getting the basement under control is to blog about the things I find. If I take a picture and tell the story, the enchantments that tie these things to my life will be lifted. Rather than throwing away pieces of myself, I will celebrate and preserve them here...before tossing them in the dumpster.
It will be solipsistic, I'm sure, but you know, the blog is called "A Glimpse at Don." I think I'll enjoy it. Hopefully you won't find it intolerable.
Sunday, January 24, 2010
The Dark Side
I'm learning to spin. It's WonderMike's fault. He just looked so cool, so happy, standing there at Sock Summit, roving draped around his neck, making beautiful yarn. It wasn't a chore; it was an enjoyable pasttime, something to do with his hands while he chatted and laughed with passers-by.
I've actively resisted spinning. Yes, the spindles were pretty. Yes, the handspun was beautiful. But no, I didn't need to do it myself. I am perfectly happy letting others raise the sheep, sheer the wool, clean it, dye it, spin it. I like being further up this food chain: buying the yarn and knitting it into something nice.
But stupid WonderMike had to open the door, and Abby Franquemont slipped in, with her engaging and witty Ravelry persona and her terrific Intro to Spinning video on YouTube. Her simple explanation -- spinning is just pulling apart fiber and twisting it so it holds together; use a stick to hold the yarn and make things go faster -- was irresistible to me. And her book! Oh my god, her book. I love a funny, smart woman talking to me about the physics of yarn. And she blew my mind by pointing out that spindles are responsible for nearly all human textile production up until about 400 years ago.
So a week ago, I took a class.
I'm not very good, but I don't expect to be. Abby (and others) argue that learning to spin involves developing muscle memory, and that if I keep practicing a little each day, I'll get it in about a month or two.
The result so far:

That's what became of the roving I got in class. Now I'm getting serious with some dyed combed top that I bought at a local store.

So I'll give it a couple months, working at it every day. If it doesn't click by spring, I'll drop it. And if it does click, I'll probably still drop it: I like to knit things, not make yarn. I'm not interested in owning a wheel. (If I'm buying equipment, I'd rather it was a circular sock machine).
But meanwhile, I think I'm learning a lot about yarn. And I've got an excuse now to look at the spindles at the wool festivals.
I've actively resisted spinning. Yes, the spindles were pretty. Yes, the handspun was beautiful. But no, I didn't need to do it myself. I am perfectly happy letting others raise the sheep, sheer the wool, clean it, dye it, spin it. I like being further up this food chain: buying the yarn and knitting it into something nice.
So a week ago, I took a class.
I'm not very good, but I don't expect to be. Abby (and others) argue that learning to spin involves developing muscle memory, and that if I keep practicing a little each day, I'll get it in about a month or two.
The result so far:

That's what became of the roving I got in class. Now I'm getting serious with some dyed combed top that I bought at a local store.

So I'll give it a couple months, working at it every day. If it doesn't click by spring, I'll drop it. And if it does click, I'll probably still drop it: I like to knit things, not make yarn. I'm not interested in owning a wheel. (If I'm buying equipment, I'd rather it was a circular sock machine).
But meanwhile, I think I'm learning a lot about yarn. And I've got an excuse now to look at the spindles at the wool festivals.
Sunday, December 06, 2009
Mishap
Just finished knitting up the front and joining those front panels to the back on this sweater.
It wasn't until I put the photo on my computer and rotated it 90° that I noticed the problem. It's rather more visible in the photo than it is in real life, but yeah, it's definitely there.
What do you think? Live with it? Or unpick the shoulder seam and rip back?
It wasn't until I put the photo on my computer and rotated it 90° that I noticed the problem. It's rather more visible in the photo than it is in real life, but yeah, it's definitely there.What do you think? Live with it? Or unpick the shoulder seam and rip back?
Sunday, November 15, 2009
Hail, Yarnissima
The last two posts have been about sock patterns that have failed to capture my heart, but now I want to spread some love.
Yarnissima first came to my attention in a discussion on Ravelry about Cookie A's book Sock Innovation and it's exclusive cuff-down designs. Pinneguri put forth the idea that Cookie is a designer of patterns rather than architecture, contrasting her with Yarnissima, "a sock- architect, she makes socks differently, she builds them up." I made a note to check out this Yarnissima person, and I'm very happy that I did.

The pattern is called "brainless" and it highlights two very simple and very cool features that show up in Yarnissima's designs: a cable embellishment running along the sides of the foot, and a gusset triangle which is bordered by twisted stitches and emphasized with a purl background.
Isn't that cool? What a brilliant stroke of creativity to turn the gusset section into fixture of the sock design, rather than trying to hide it.
Yarnissima's designs are available from her website, and I encourage you to check them out. There are more designs that were exclusive to sock clubs, and I hope those eventually see the light of day.
Yarnissima first came to my attention in a discussion on Ravelry about Cookie A's book Sock Innovation and it's exclusive cuff-down designs. Pinneguri put forth the idea that Cookie is a designer of patterns rather than architecture, contrasting her with Yarnissima, "a sock- architect, she makes socks differently, she builds them up." I made a note to check out this Yarnissima person, and I'm very happy that I did.

The pattern is called "brainless" and it highlights two very simple and very cool features that show up in Yarnissima's designs: a cable embellishment running along the sides of the foot, and a gusset triangle which is bordered by twisted stitches and emphasized with a purl background.
Isn't that cool? What a brilliant stroke of creativity to turn the gusset section into fixture of the sock design, rather than trying to hide it.
Yarnissima's designs are available from her website, and I encourage you to check them out. There are more designs that were exclusive to sock clubs, and I hope those eventually see the light of day.
Saturday, November 14, 2009
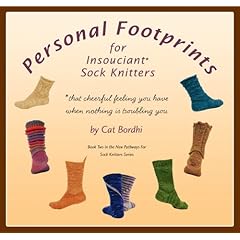
Frontiers of Sock Construction 2: Personal Footprints
So perhaps my expectations were a little too elevated.
The Personal Footprint sock is another of those simple and genius discoveries that Bordhi has become relatively famous for: socks on 2 circs, the Moebius cast-on, and the elegant math and "No Rules" gussets of the New Pathways sock. In "Personal Footprints," Bordhi presents us with the "afterthought cuff." As I said in my last post, this is a brilliant departure from common sense -- knitting the foot of the sock as a closed tube which is then cut open to knit the ankle portion of the sock.
This innovation let's Bordhi focus on customizing the fit of the sock to the individual owner. In a nutshell here's what you do:
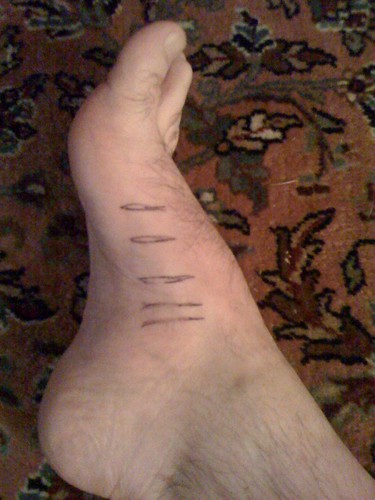
- Cut out a tracing of the foot to serve as your guide. This is the eponymous "footprint."
- Knit a toe-up sock, trying it on as you go and increasing as needed to fit the wearer's foot. Along the way, make notes on your footprint (toe/heel length, arch increases, ankle point, etc.)
- After marking on your knitting where the leg will be, close off your tube by knitting a round heel.
- Thread needles through your knitting at the cuff point, snip the yarn, unravel, and proceed with your cuff.
My biggest problem is that you have to keep trying on the sock -- over and over and over and over. Inevitably, this means you have to keep ripping back and adjusting, because until knitted fabric has about an inch extra to give the stitches some integrity, you can't reliably check the fit.
I prefer to plan ahead: know my gauge, know my targets for making the sock fit.
In the end, round toes and heels don’t fit my foot well, and I wasn't happy enough with my Discovery Sock to finish it and make more. Maybe over the holidays I'll get some members of my family drunk, put pen marks all over their feet, and try making Personal Footprints for them. But ultimately I don't see this ever becoming more than a novelty side trip in my sock knitting career.
The book is a good production. The instructions are clear, and Bordhi's videos supplement the book well. There's a nice assortment of specific sock patterns included, although only a couple of them really grabbed my attention. Personally, I would have been much happier if the book had dispensed with the patterns altogether, focused on the technique, included better notes to improve fit, and retailed for half the price. But I'm glad I have it, and I expect I'll return to the technique a couple times when looking for departure from the routine.
Monday, November 09, 2009
Frontiers of Sock Construction 1: The Hat Heel
In September, two new frontiers opened up in the sock knitting world: Hat Heel and Personal Footprints. I'm certain that, for two months, you've been dying to know what I think of them.
Naturally, I was intrigued by both. Creative construction has always fascinated me. Mom taught me to knit so I could make a ski band, but a simple, wide loop would not do -- I wanted something with character and shape, something that got wider and narrower as needed. And duh: no sewing allowed.
These two sock-making methods are right up my alley. "Hat Heel" starts with the heel and builds the sock outwards from unusual gusset constructions. "Personal Footprints" is a brilliant departure from common sense, instructing you to knit the foot of the sock as a closed tube which is then cut and opened to knit the cuff.
I've tried both, and my world is unchanged. Probably. There may be something to "Personal Footprints," but more on that later. First up: the Hat Heel.
The pattern is wicked clever, and it starts off fun: you knit a round cup-shape for the heel, then make long, wing-like triangles that will wrap around your foot and join at the top. That's where things began to go badly for me. I had trouble making a smooth join with so few stitches at the points of the triangles. But then the next step was a nightmare. Picking up stitches isn't usually a deal-breaker for me, but it’s not my favorite knitting activity, and this requires you to be pretty good at it, picking up all around both sides of the loop you've made. I made a dog’s breakfast out of it.
In the end, I won the battle but surrendered the campaign (the war goes on). No matter how skilled you might be at neatly picking up stitches, you're creating inflexible seams in your sock, right at the point that your foot needs the most flexibility. A lot of hard, messy work for a sock you're destined to hate wearing.
Tomorrow: Personal Footprints for Insouciant Sock Knitters.
PS: Click the picture to embiggen, and check out that gorgeous yarn. It's "Tesla" from Gaslight Dyeworks.
Naturally, I was intrigued by both. Creative construction has always fascinated me. Mom taught me to knit so I could make a ski band, but a simple, wide loop would not do -- I wanted something with character and shape, something that got wider and narrower as needed. And duh: no sewing allowed.
These two sock-making methods are right up my alley. "Hat Heel" starts with the heel and builds the sock outwards from unusual gusset constructions. "Personal Footprints" is a brilliant departure from common sense, instructing you to knit the foot of the sock as a closed tube which is then cut and opened to knit the cuff.
I've tried both, and my world is unchanged. Probably. There may be something to "Personal Footprints," but more on that later. First up: the Hat Heel.
The pattern is wicked clever, and it starts off fun: you knit a round cup-shape for the heel, then make long, wing-like triangles that will wrap around your foot and join at the top. That's where things began to go badly for me. I had trouble making a smooth join with so few stitches at the points of the triangles. But then the next step was a nightmare. Picking up stitches isn't usually a deal-breaker for me, but it’s not my favorite knitting activity, and this requires you to be pretty good at it, picking up all around both sides of the loop you've made. I made a dog’s breakfast out of it.In the end, I won the battle but surrendered the campaign (the war goes on). No matter how skilled you might be at neatly picking up stitches, you're creating inflexible seams in your sock, right at the point that your foot needs the most flexibility. A lot of hard, messy work for a sock you're destined to hate wearing.
Tomorrow: Personal Footprints for Insouciant Sock Knitters.
PS: Click the picture to embiggen, and check out that gorgeous yarn. It's "Tesla" from Gaslight Dyeworks.
Sunday, November 08, 2009
We interrupt this hiatus with a post
So, yeah, I haven't posted anything in 3 months. I can't even say that there's been nothing to write about: in socks alone there was Sock Summit, a funky new sock-construction method on Knitty, my new-found adoration for Yarnissima, a big "Ah Ha" moment I had about my Evil Genius numbers, and a new Cat Bordhi book. I'm doing another Stopwatch Sock project to test how long it takes me to knit a pair, and I think I'm rekindling my love for the PGR short-row heel. Plus, I've knit a shawl, I'm thinking about knitting another one, and I've got a sweater project going.
I haven't written about any of this because I'm lazy. So maybe this is a sign that you'll be hearing more from me here. Or maybe it's not.
Subscribe to:
Posts (Atom)